|
<< Click to Display Table of Contents >> Reports |
  
|
|
<< Click to Display Table of Contents >> Reports |
|
Most of the program's reports are accessed from the pull-down Report Menu. There are hundreds of reports in SiteMaster, so the following are some samples. There are also additional reports that are launched with buttons that appear on various screens and subscreens within the program. These reports are covered in the Help Manual from within the individual topic in which they're explained.
This topic includes:
Report Setup Components and Options
|
|
1. From the pull-down Report Menu select the report that you want to view and/or print. This displays a report setup screen about that report category.
2. On the report setup screen select the options that you want for the report. See Report Setup Components below.
3. Click on the Preview button to first preview the report with the option to print it. The report will display including a Print Preview Button Bar. To learn how to use the button bar see The Print Preview Button Bar below.
4. Click on the Print button just to print the report.
Important: The Print button option on the report setup screen, allows you to choose how many copies and which pages that you want to print. The print function on the Preview option only lets you print the entire report.
Note: There are also many reports that are accessed directly from record information screens throughout the program.
Report Setup Components and Options
You have a number of options on a report setup screen in order to customize the information that's used in the report.

![]()
Record Selection Field - This field is used in a couple of different ways. First, the field may be used to pick a sort order for a particular report. Second, the field is used to select a record from its drop-down list to run a report that only includes that record. The field may also be left blank so that the report includes all of the records in the selection list. Use the Clear Record (Red X) button next to the field to clear a displayed record.
Record Lookup Field - Use this field to look up and select a specific record from a Find Information Screen. This is done by clicking on the Binoculars button.
Check Box - Use the Check Box to control the way that a report is formatted. For example, selecting the Check Box will create a separate page for each primary record heading.
Radio Buttons - Radio Buttons are used to select the type of report option that you want to run.
Whenever you decide to preview a report, the report will be displayed including a small button bar called Print Preview. You use the Print Preview button bar to select the report's pages, look up a page, change the size of the page, or print the report.
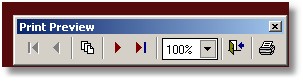
When you pass your mouse pointer over any of the button icons on the Print Preview button bar, text appears and displays the function of the button. The inner right and left arrows select the next or previous page. The outer arrows select the first or last page of the document. The stacked pages icon lets you go to a specific page in the report. You click on the down arrow of the 100% field to increase or reduce the page view by a selected percentage. The printer icon is for printing the document. The open door icon is used to close the report page and return to the report setup screen.
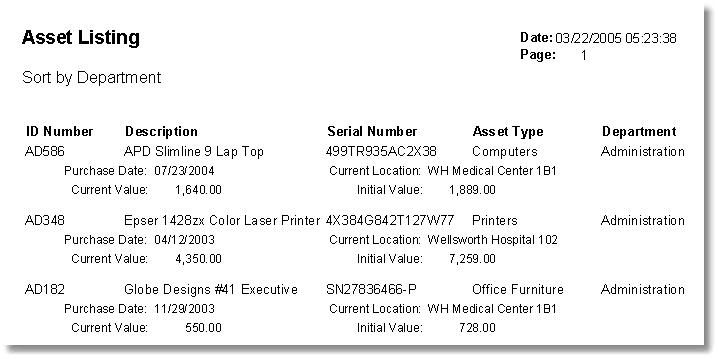
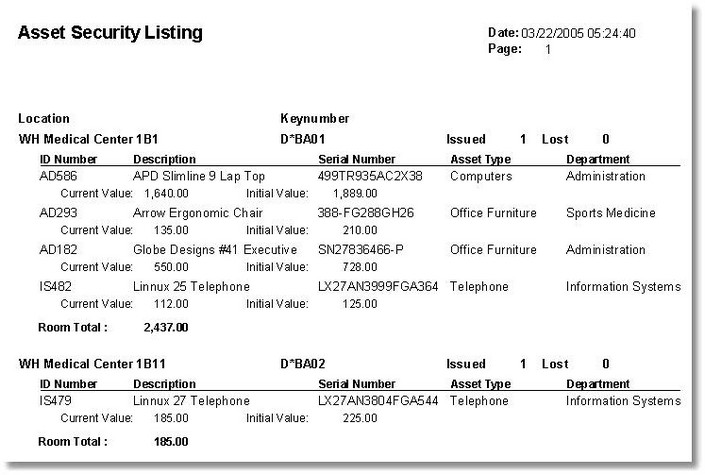
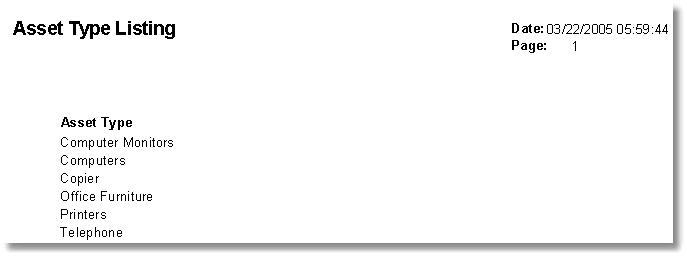
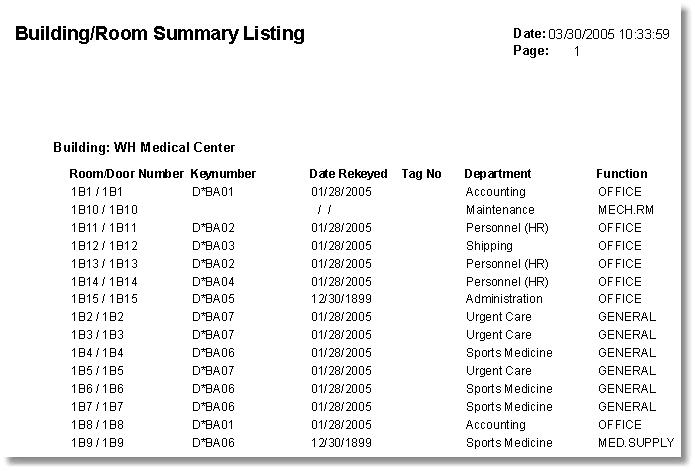
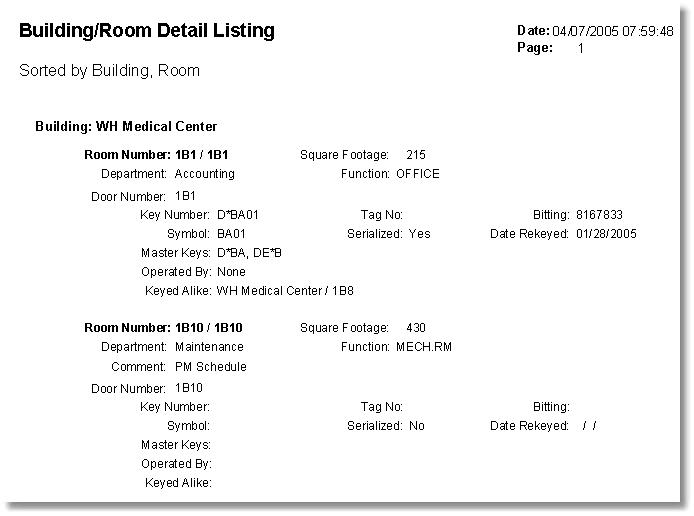
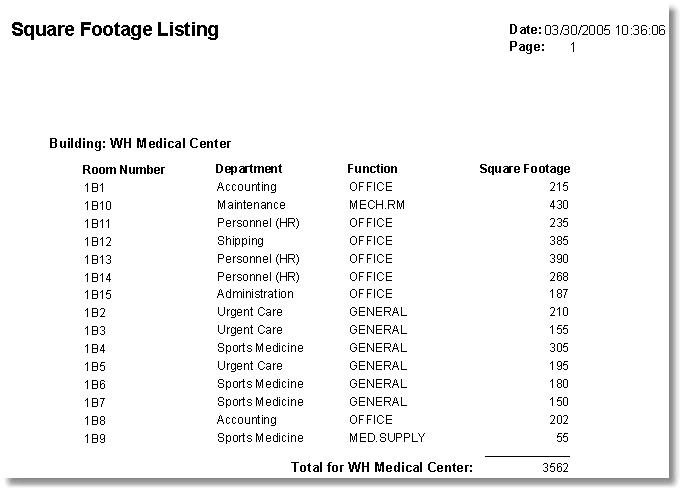
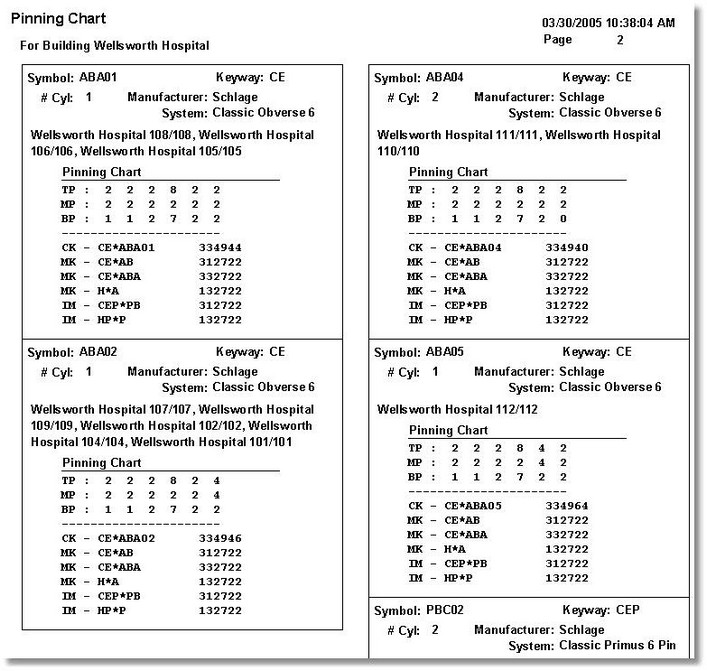
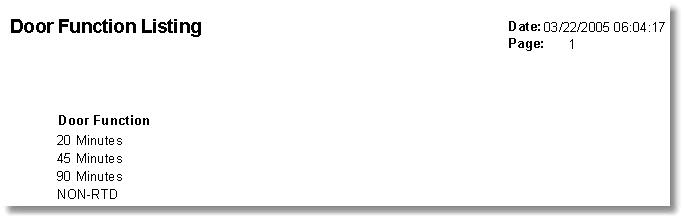
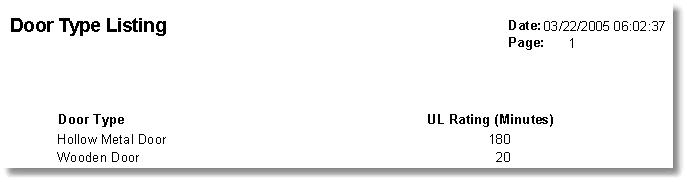
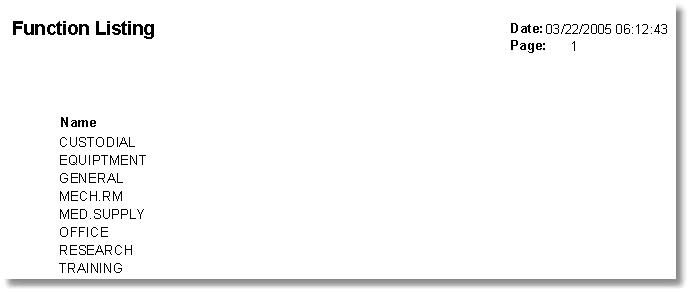
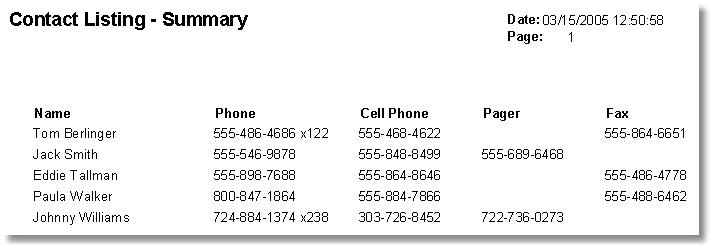
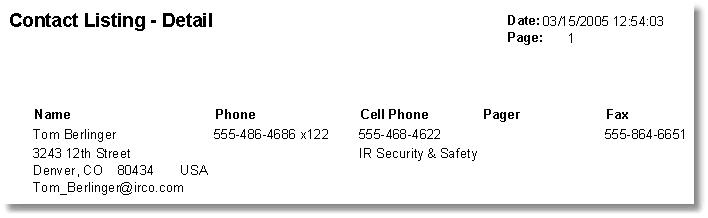
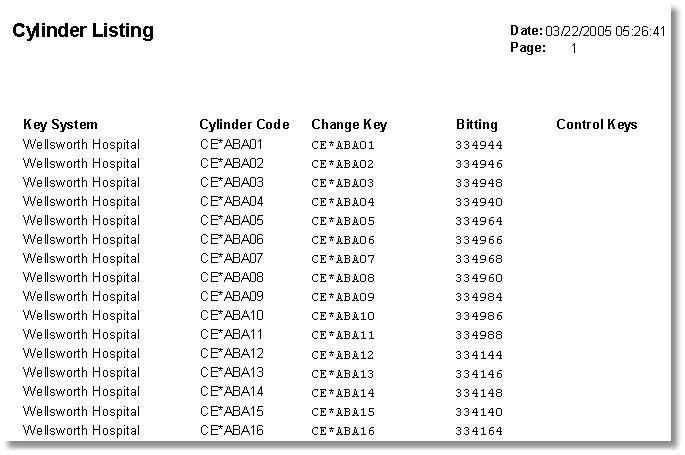
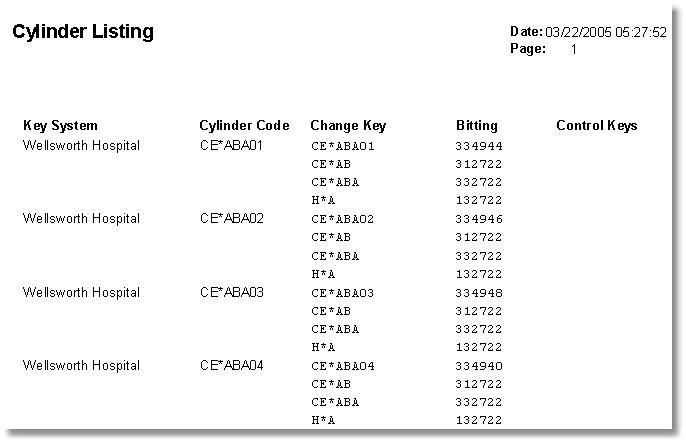
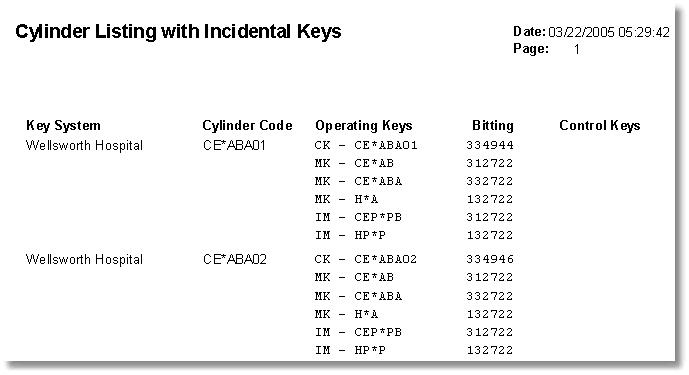
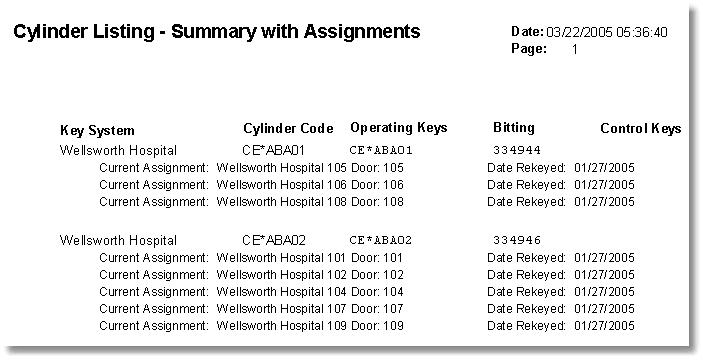
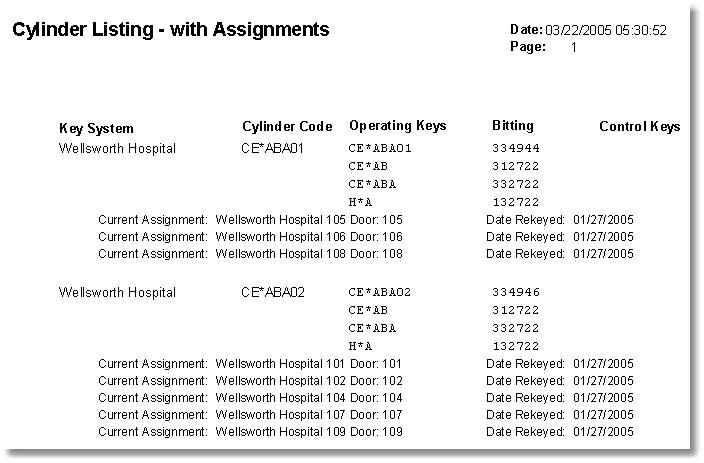
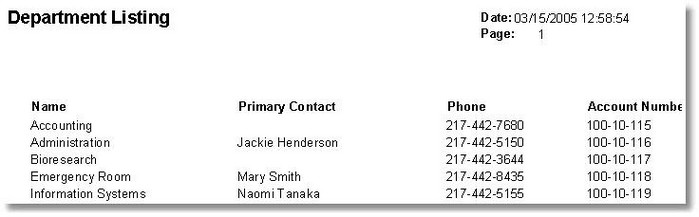
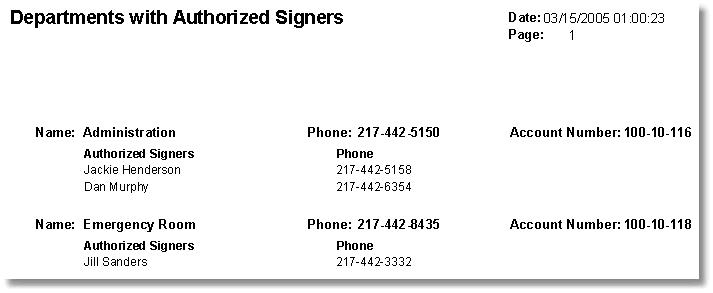
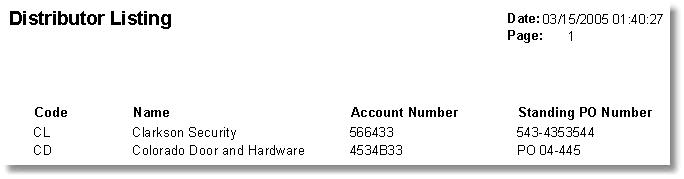
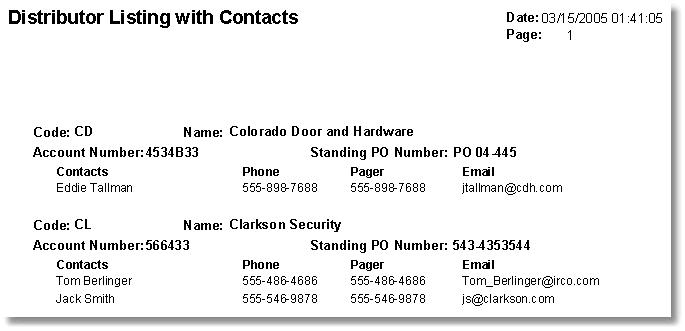
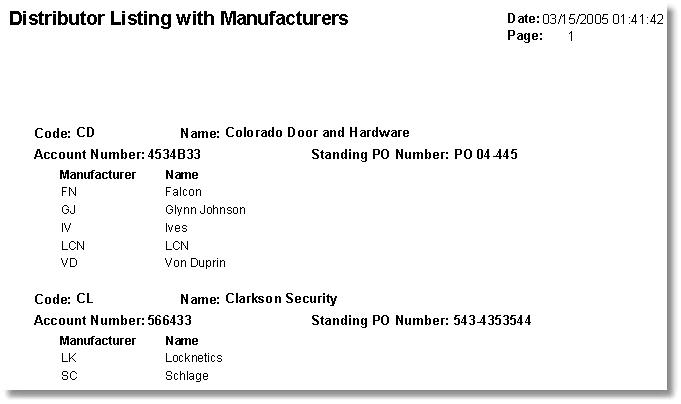
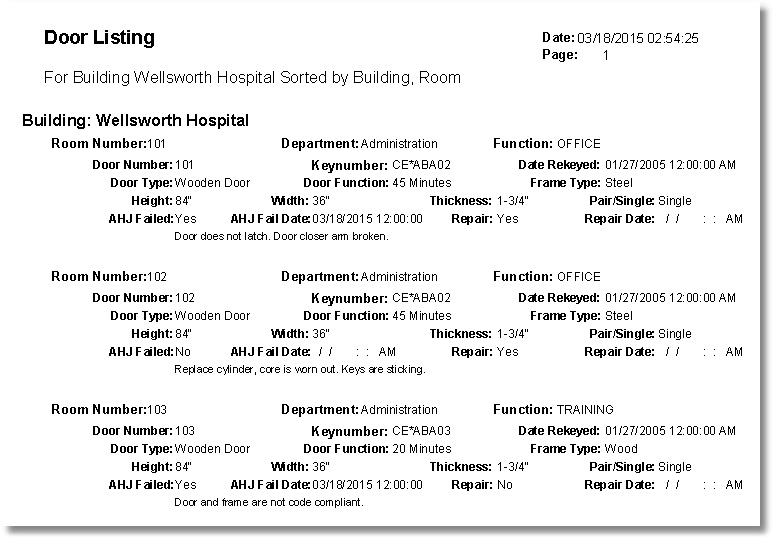
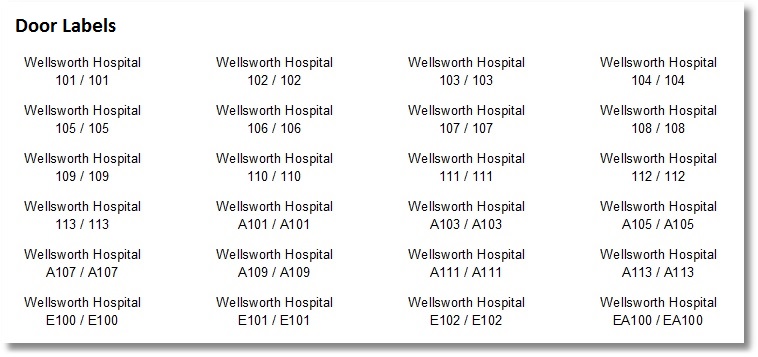
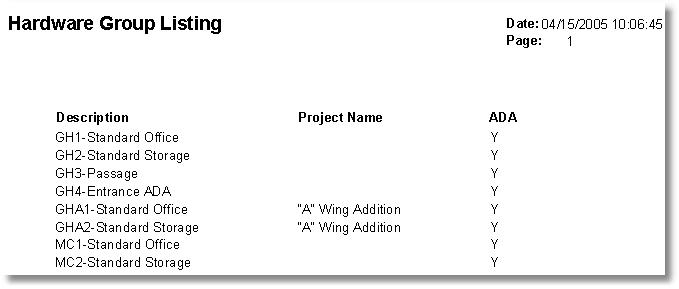
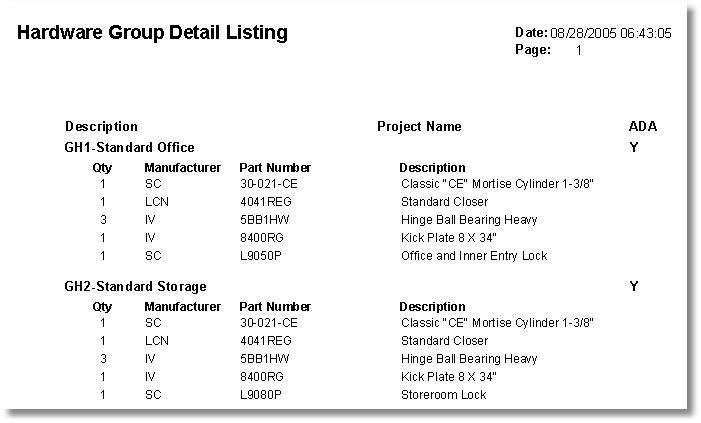
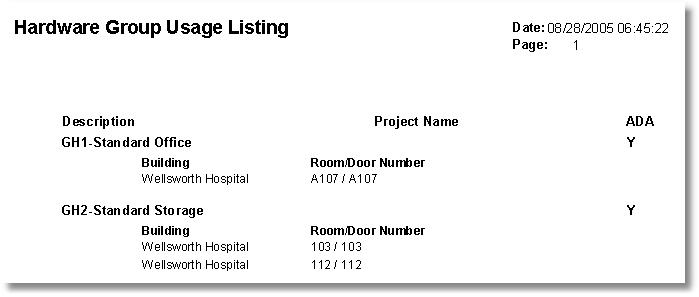
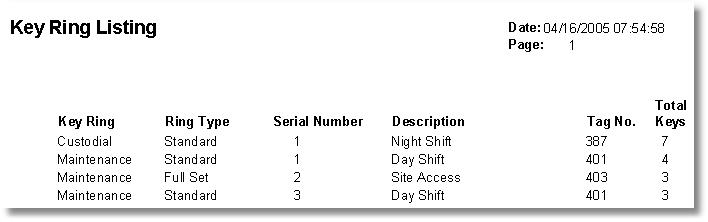
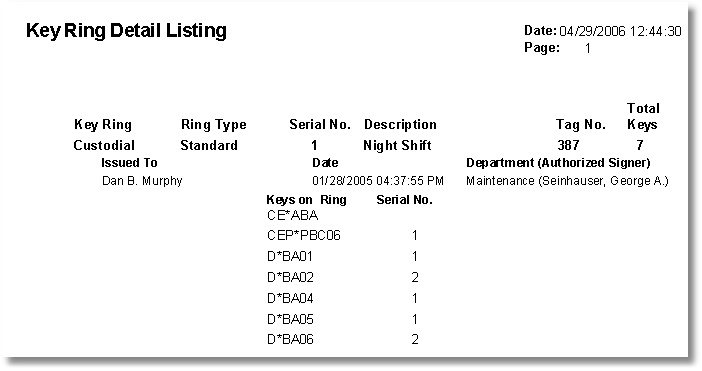
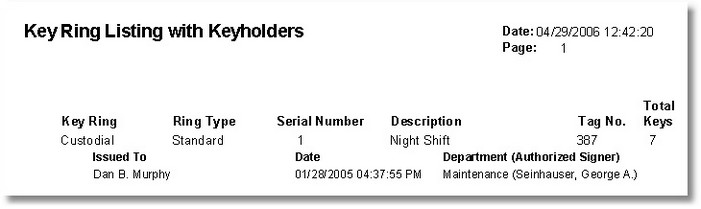
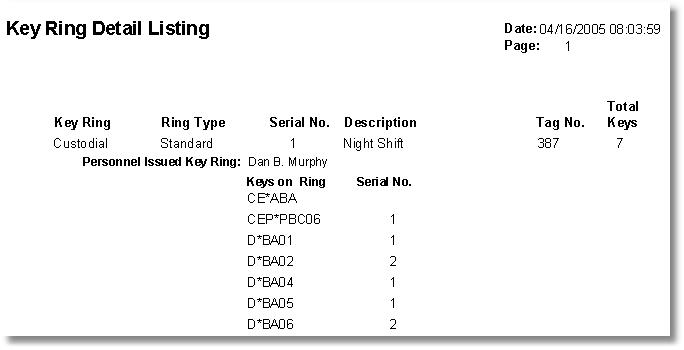
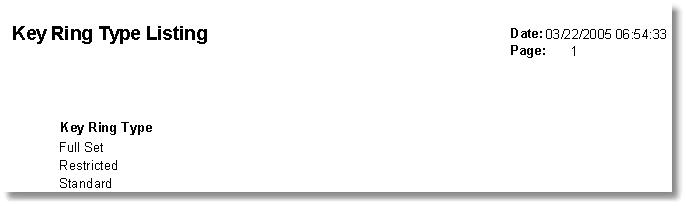
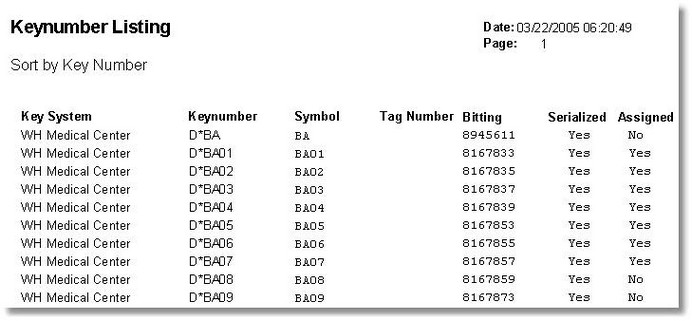
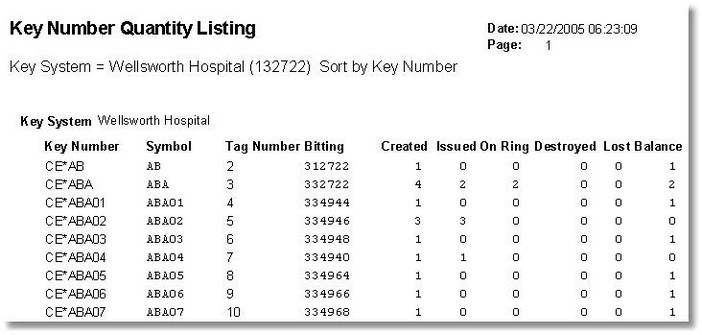
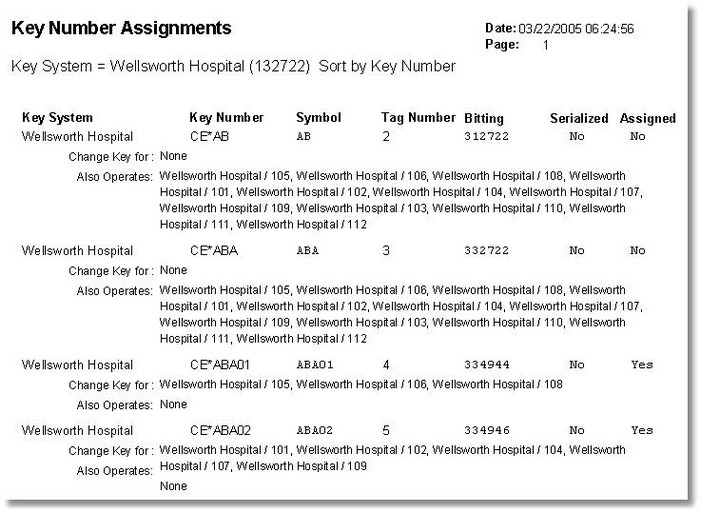
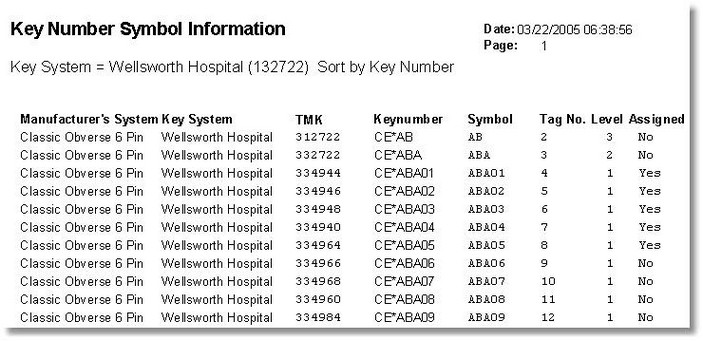
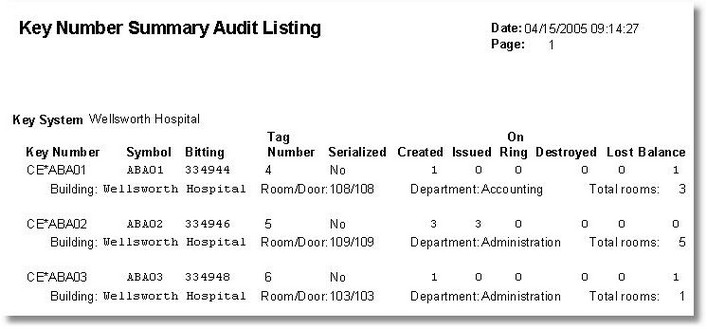
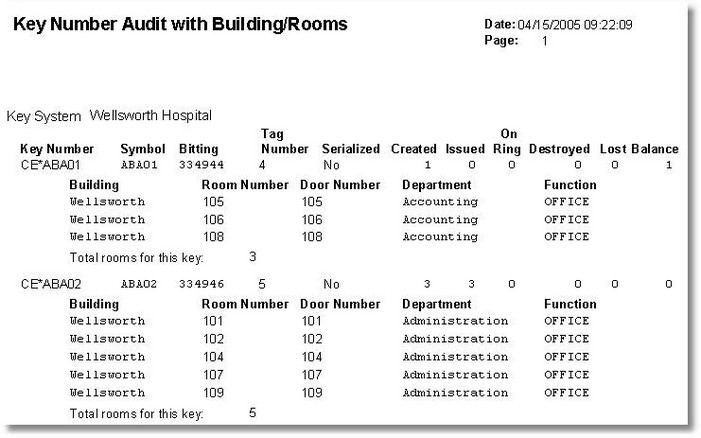
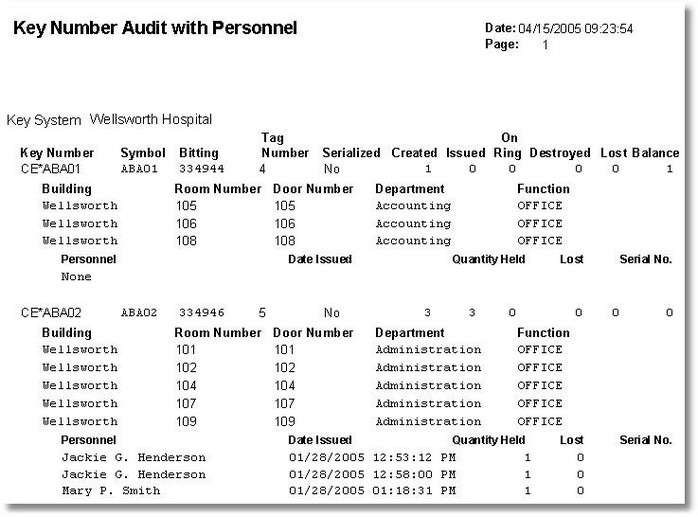
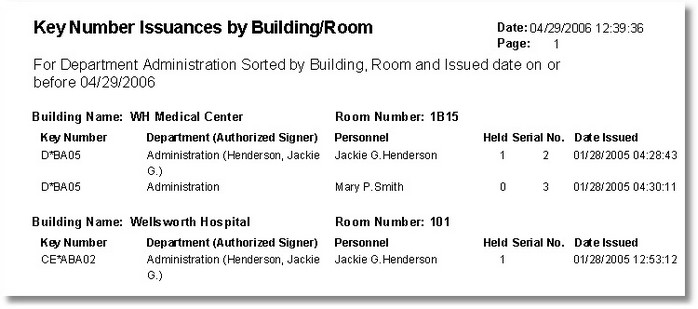
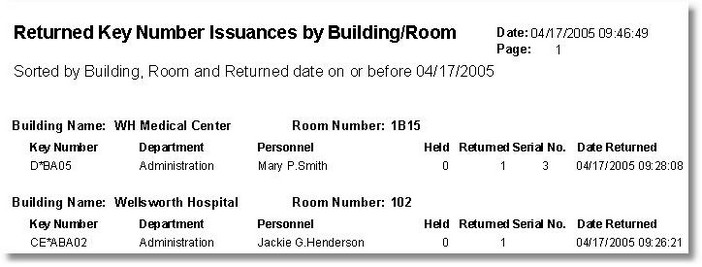
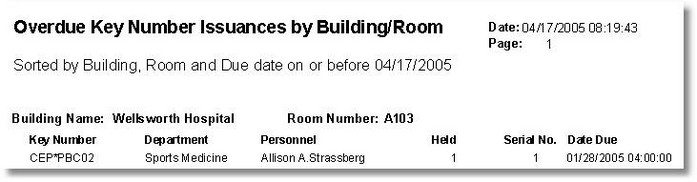
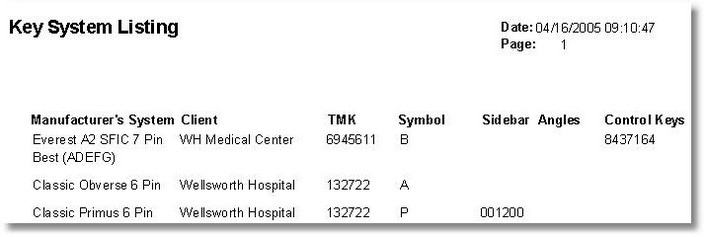
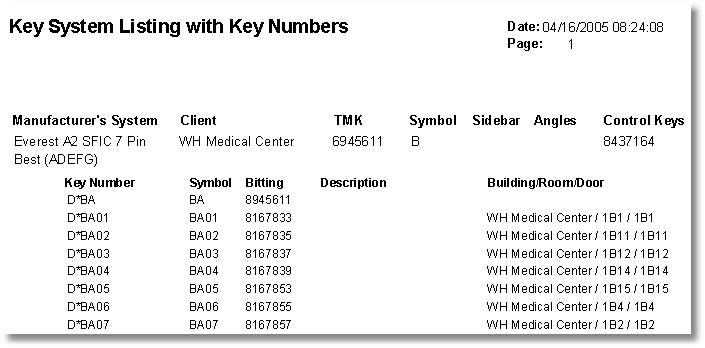
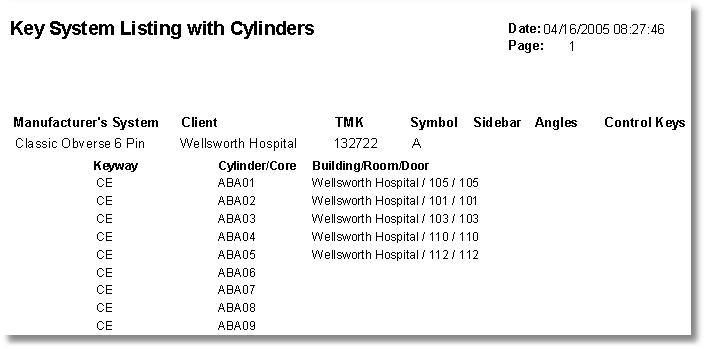
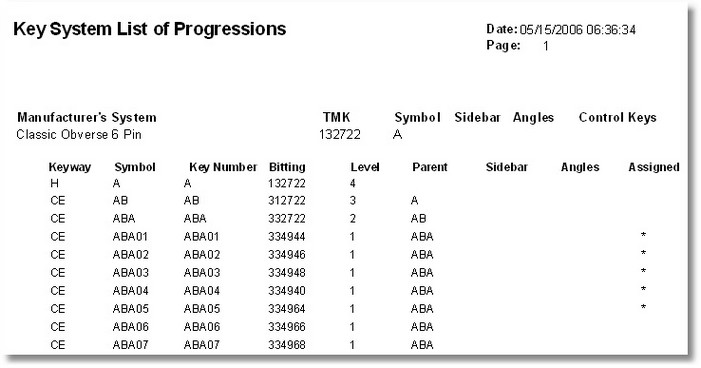
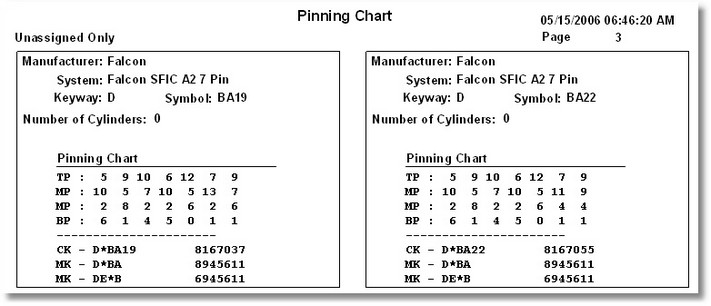
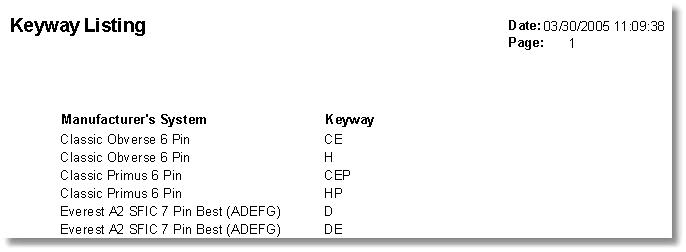
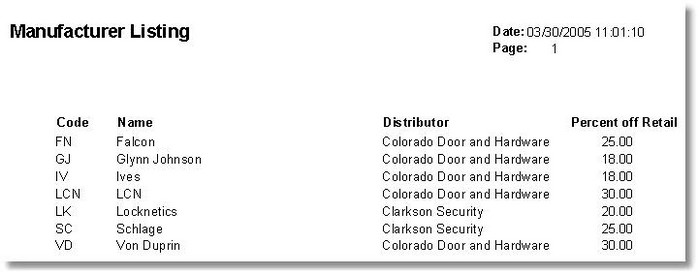
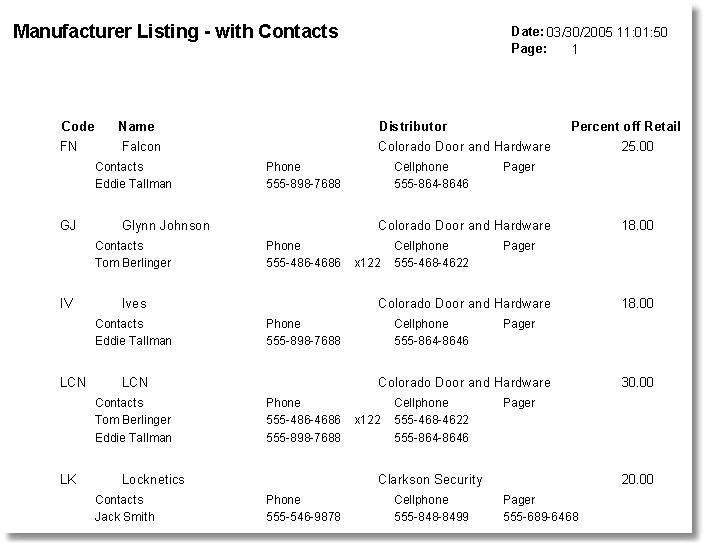
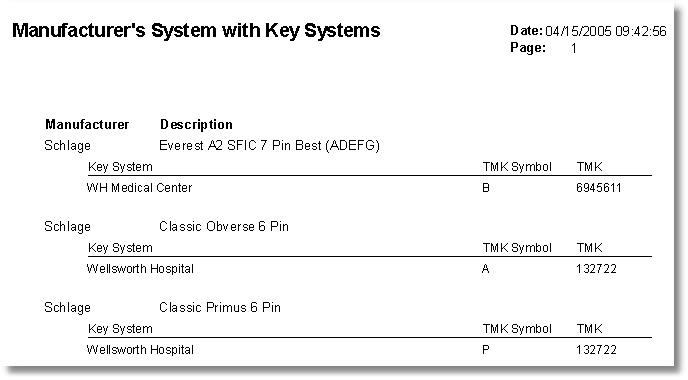
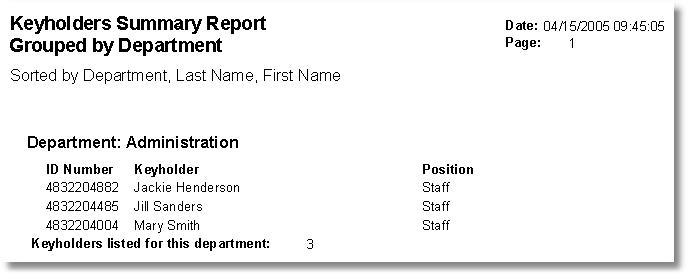
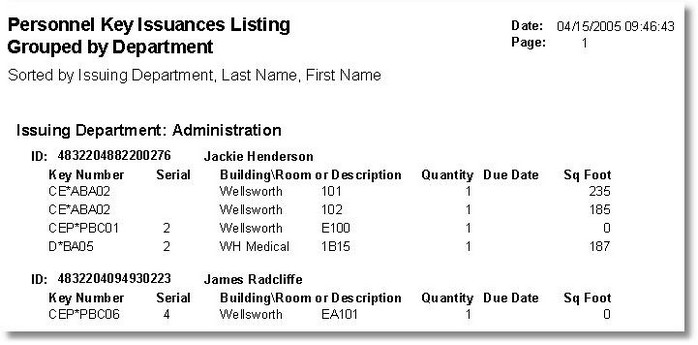
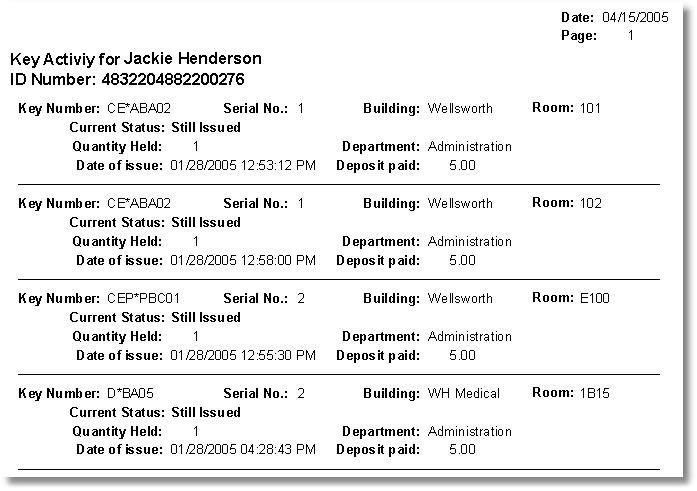
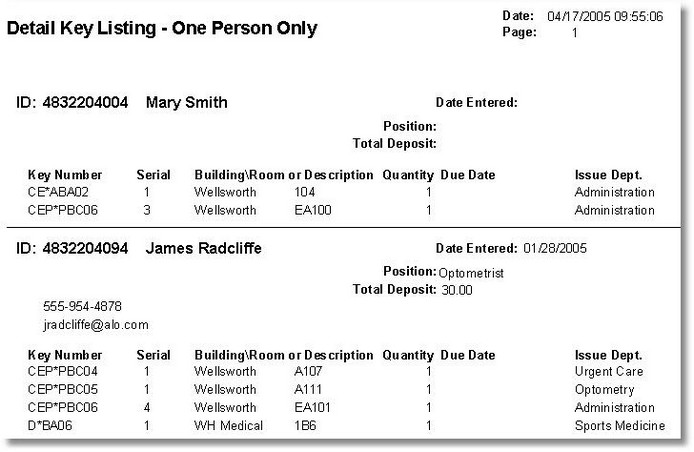
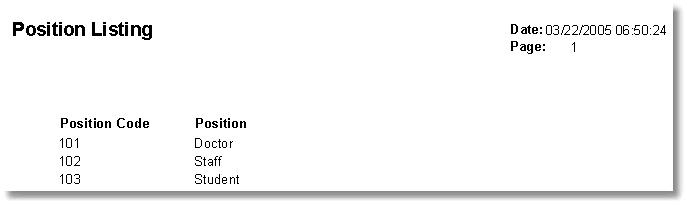
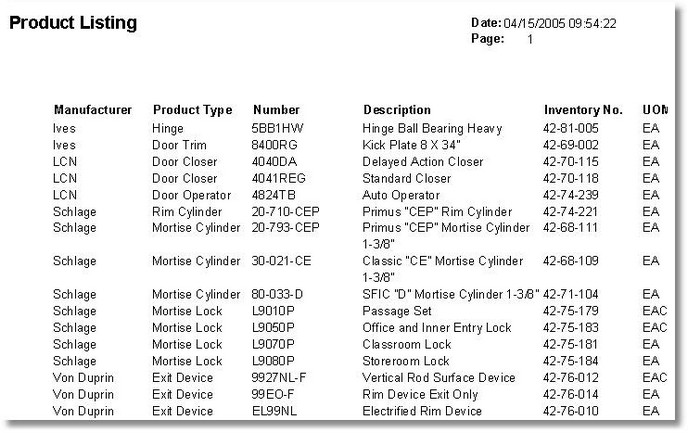
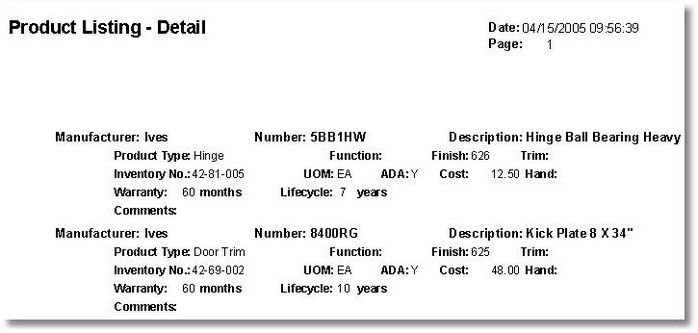
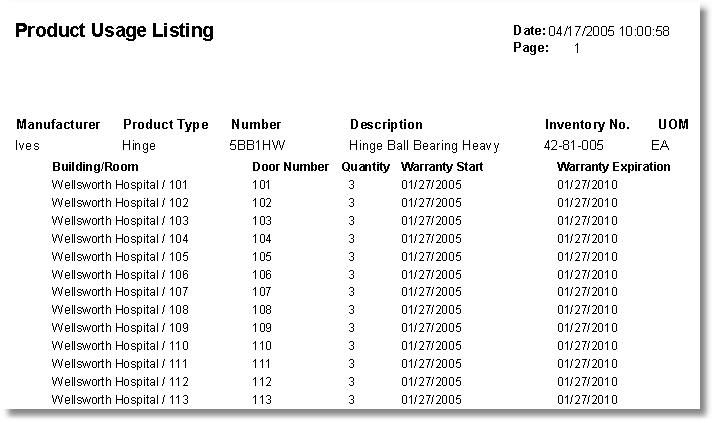
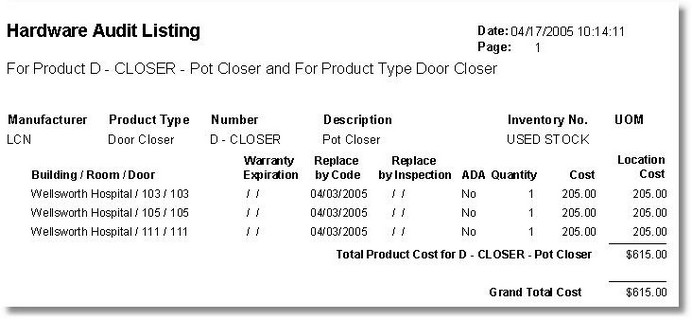
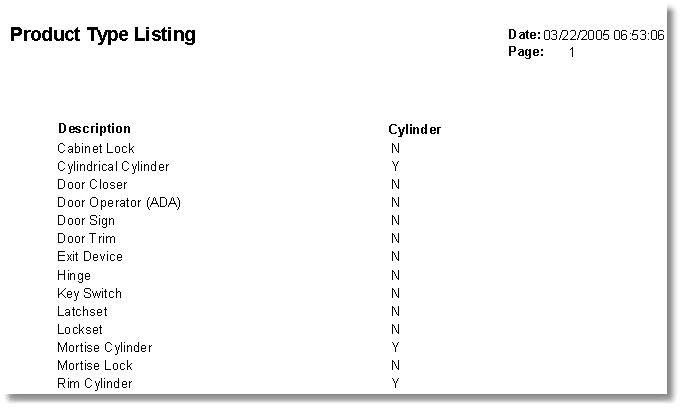
Sample Reports